Installing outdoor dummy cameras involves selecting visible locations, mounting with weatherproof hardware, and utilizing features like night vision and motion detection. Place them near entrances, exits, and windows for optimal security deterrence without complex wiring. Regular cleaning, wear part replacement, and battery checks ensure longevity in various weather conditions. Follow these steps for an affordable, effective business security solution.
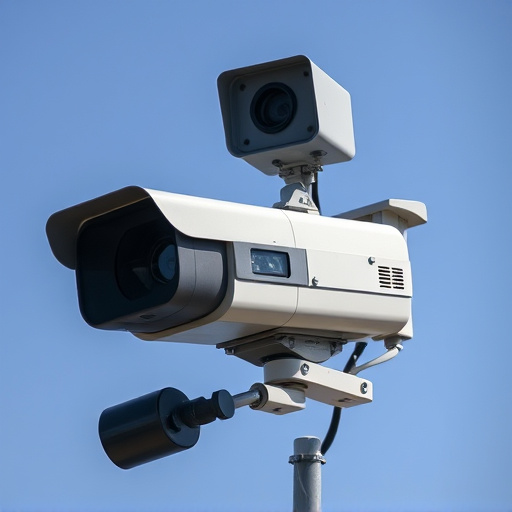
In today’s digital era, enhancing business security with outdoor dummy camera installation has become a game-changer. Understanding weatherproof fake cameras offers significant benefits, from deterring theft and vandalism to providing peace of mind. This article delves into the world of these innovative solutions, guiding you through choosing the right location for maximum impact, installing your cameras properly, and maintaining them to withstand all weather conditions. By following these outdoor dummy camera installation steps, businesses can ensure robust security measures year-round.
- Understanding Weatherproof Fake Cameras for Business
- Benefits of Outdoor Dummy Camera Installation
- Choosing the Right Location for Fake Cameras
- Step-by-Step Guide to Installing Weatherproof Fakes
- Maintenance Tips for Longevity in All Weather Conditions
Understanding Weatherproof Fake Cameras for Business
Weatherproof fake cameras, also known as outdoor dummy cameras, are an essential tool for businesses aiming to enhance security and deter potential criminals. These realistic-looking cameras mimic the appearance of real surveillance equipment, providing a powerful visual deterrent without the cost and complexity of installing genuine security systems. Understanding how these cameras work and their installation process is crucial for effective utilization in various business settings.
The outdoor dummy camera installation typically involves several simple steps. First, choose a location that offers clear visibility and aligns with your security needs. These cameras can be strategically placed on walls, poles, or even disguised among natural elements to blend into the surroundings. Once positioned, secure the camera firmly using appropriate hardware, ensuring it’s weatherproof to withstand varying outdoor conditions. Many models come with night vision capabilities, allowing for 24/7 monitoring, and some advanced versions may include motion detection features for added alertness.
Benefits of Outdoor Dummy Camera Installation
Installing outdoor dummy cameras offers a multitude of benefits for businesses looking to enhance security and deter potential thieves or vandals. These realistic-looking, weatherproof fake cameras act as a powerful deterrent without breaking the bank. They provide a cost-effective alternative to real security cameras, especially in areas where surveillance is desired but a full camera system isn’t feasible or affordable.
The installation process for outdoor dummy cameras is straightforward and can be completed in simple steps: choose a location with clear visibility, place the camera strategically, ensure it’s securely fastened, and power it up. This simple setup allows businesses to quickly and easily add an extra layer of protection without complex wiring or professional installers. Moreover, these cameras are designed to withstand various weather conditions, making them a reliable solution for outdoor security concerns.
Choosing the Right Location for Fake Cameras
When considering outdoor dummy camera installation, choosing the right location is paramount. Place your fake cameras in spots that mimic real surveillance areas, such as near entrances, exits, and windows. Avoid visibly conspicuous places to maintain authenticity; instead, opt for discrete locations like corners or behind fixtures where genuine security cameras might be installed.
Consider factors like lighting, visibility, and the camera’s field of view. Ensure adequate illumination for clear footage during all hours, and verify that the camera’s angle covers a reasonable area without capturing unnecessary details outside its intended surveillance zone. Following these outdoor dummy camera installation steps will help ensure your fake cameras serve their purpose effectively while maintaining realism.
Step-by-Step Guide to Installing Weatherproof Fakes
Installing weatherproof fake cameras is a straightforward process that can significantly enhance security measures for your business. Here’s a step-by-step guide to ensure a successful Outdoor Dummy Camera Installation:
1. Select Suitable Location: Choose a strategic spot where real cameras would be placed, ensuring visibility of key areas. Consider factors like lighting, obstructions, and the camera’s field of view. Weatherproof fakes should mimic these placements accurately.
2. Prepare the Surface: Ensure the surface is clean, dry, and free from debris or obstacles that could hinder installation. If necessary, use a level to ensure the camera mount is straight and secure.
3. Attach the Mounting Hardware: Securely fasten the provided mounting hardware to the selected location using screws or other suitable fasteners. Double-check that it’s sturdy enough to withstand outdoor conditions.
4. Position the Fake Camera: Carefully place the weatherproof fake camera on the mount, ensuring it aligns with your security plan and doesn’t obstruct any essential features or areas.
5. Secure the Camera: Tighten all screws and locking mechanisms until the camera is firmly in place. Make sure it can withstand wind, rain, and other harsh weather conditions without moving or dislodging.
6. Test Functionality: After installation, test the camera’s functionality—zoom, motion detection, and any additional features—to ensure it operates as expected under all conditions.
Maintenance Tips for Longevity in All Weather Conditions
To ensure your weatherproof fake cameras maintain their longevity and functionality in all weather conditions, proper maintenance is key. Start by regularly cleaning the camera’s exterior with a soft, damp cloth to remove dirt and dust accumulation. Be mindful not to use any harsh chemicals or abrasive materials that could damage the surface. Inspect the camera for any signs of wear and tear, particularly around seals and connections. Replacing worn-out parts promptly will prevent water ingress and ensure optimal performance.
When it comes to outdoor dummy camera installation steps, consider storing spare parts, such as O-rings and gaskets, in a dry, secure location. This proactive approach will facilitate quick repairs or replacements if needed, further extending the camera’s lifespan. Additionally, periodically checking the camera’s battery life and ensuring proper charging will maintain its operational readiness. These simple yet effective maintenance practices will contribute to reliable surveillance under varying weather conditions.
Weatherproof fake cameras offer a cost-effective and realistic solution for business security, especially when combined with strategic Outdoor Dummy Camera Installation. By carefully choosing locations and following simple steps like those outlined in this guide, businesses can enhance their surveillance capabilities without breaking the bank. Regular maintenance is key to ensuring these dummy cameras withstand various weather conditions, making them a reliable investment for any commercial property.