Realistic Security Camera Shell: Installation Guide for Outdoor Dummy Cameras
For successful Outdoor Dummy Camera Installation, understand outdoor conditions and choose weatherpr…….
For successful Outdoor Dummy Camera Installation, understand outdoor conditions and choose weatherproof, impact-resistant components with realistic design. Select optimal placement, ensure proper wiring, and secure mounting at height for enhanced visual coverage. Follow a step-by-step process including site preparation, assembly, mounting, fine-tuning settings, and testing functionality to maximize security benefits while minimizing attention.
“Uncover the secrets to achieving a robust and realistic outdoor dummy camera setup with our comprehensive guide. We demystify the process, from understanding specific requirements for outdoor dummy cameras to selecting the perfect installation spot. Learn how to prepare the security shell and mount hardware effectively.
Our step-by-step approach ensures a seamless installation process, followed by final touches and testing tips for optimal performance. Master the art of outdoor dummy camera installation with these expert-backed steps.”
- Understanding Outdoor Dummy Camera Requirements
- Selecting the Right Location for Installation
- Preparing the Security Shell and Mounting Hardware
- Step-by-Step Guide to Installing the Dummy Camera
- Final Touches and Testing the System
Understanding Outdoor Dummy Camera Requirements
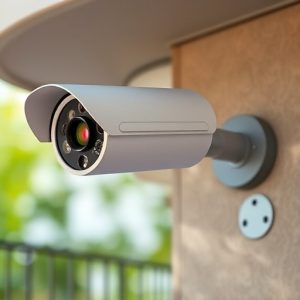
When considering an Outdoor Dummy Camera Installation, understanding the unique requirements of outdoor environments is paramount. These dummy cameras are designed to deter theft and vandalism, offering a cost-effective security solution for homes, businesses, and public spaces. Key factors include durability against extreme weather conditions, robust construction to withstand physical impacts, and a realistic design that blends seamlessly into the environment.
The installation process involves several steps: selecting an ideal placement for optimal view, ensuring proper wiring for power and data connection, and securely mounting the camera body. Using weatherproof enclosures and sealing joints helps protect internal components from moisture and dust. Additionally, positioning the camera at a strategic height and angle allows for clear, unobstructed visuals, enhancing its effectiveness as a deterrent and security tool.
Selecting the Right Location for Installation
When planning an outdoor dummy camera installation, choosing the optimal location is a critical step. The right spot can significantly enhance the security system’s effectiveness and deter potential intruders. Ideally, place the camera in a visible area where anyone attempting to trespass will be clearly observed. This could be near main entrances, exits, or any high-value assets within the property.
Consider factors like lighting—good illumination ensures clear camera views—and natural cover, such as trees or shrubs, that can provide some privacy while still allowing for effective surveillance. Following outdoor dummy camera installation steps, including mounting at eye level and ensuring a clear field of view, will contribute to a robust security setup.
Preparing the Security Shell and Mounting Hardware
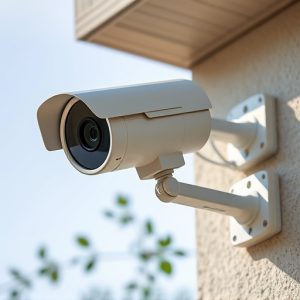
To begin preparing your security shell for an outdoor dummy camera installation, start by ensuring all components are assembled and within reach. This includes the camera housing, mounting brackets, screws, and any additional accessories specific to your model. Follow the manufacturer’s instructions to properly identify each part. Next, clean the area where the camera will be placed, removing any debris or obstacles that might interfere with a secure installation.
For mounting hardware, select a sturdy option suitable for outdoor conditions. This could include weatherproof screws and anchors designed for concrete or metal surfaces. Position the brackets according to your desired camera angle and ensure they align with the provided mounting holes. Securely fasten the brackets using the appropriate tools, making sure the hardware is tight and secure before proceeding to the next step in the outdoor dummy camera installation steps.
Step-by-Step Guide to Installing the Dummy Camera
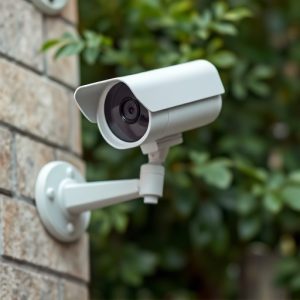
To install an outdoor dummy camera, follow this straightforward step-by-step guide. Begin by selecting a suitable location for your security camera mockup, considering visibility and potential threats. Ensure the area has stable access to power, ideally through an existing electrical outlet or a nearby junction box.
Next, carefully open the packaging of your dummy camera and lay out its components. Mount the camera body securely on a sturdy pole or wall using the included hardware. Align the camera lens for optimal view and adjust settings such as angle, zoom, and resolution according to your preferences. Once mounted, connect the camera to a power source, either through a hardwire connection or wirelessly, depending on the model’s capabilities. Test the camera’s functionality, ensuring it captures clear images and recordings as expected.
Final Touches and Testing the System
After completing the physical setup, it’s time for the final touches and a critical step in any security system installation: testing. This involves ensuring every component is functioning optimally and seamlessly integrated. Calibrate the camera’s settings, including resolution, field of view, and night vision capabilities, to meet your desired surveillance needs.
For an outdoor dummy camera, consider additional weatherproofing measures if not already incorporated into the shell design. Test the connection between the camera, recording device, and power source, verifying data transmission and stable power supply. The Outdoor Dummy Camera Installation Steps should be followed meticulously to ensure the system operates discreetly and effectively, providing a comprehensive security solution without drawing unnecessary attention.
Installing an outdoor dummy camera is a straightforward process that significantly enhances your property’s security. By carefully considering your location, preparing the shell, and following the installation steps outlined in this guide, you can easily create a realistic security system that deterrs potential intruders. Remember, the key to success lies in attention to detail and ensuring the camera blends seamlessly into its environment. With these Outdoor Dummy Camera Installation Steps, you’ll be well on your way to achieving peace of mind.