Outdoor Dummy Camera Installation: Power Options & Easy Steps
When installing an outdoor dummy camera, choosing the right power source is key. Battery-operated ca…….
When installing an outdoor dummy camera, choosing the right power source is key. Battery-operated cameras require maintenance, hardwired models offer stability, and solar-powered options are eco-friendly for remote areas. Follow 5 simple steps: select a visible location with good connectivity, mount the camera securely using provided hardware, connect a power adapter, and set up optional remote access via your home network and app for monitoring and alerts.
“Discover the secrets to seamless outdoor dummy security camera installation with our comprehensive guide. Understanding power options is key, as it dictates the camera’s effectiveness and longevity. This article equips you with knowledge on meeting specific power requirements for optimal performance. From preparing essential tools to a detailed step-by-step process, learn how to install your outdoor dummy camera effortlessly. Master the art of outdoor security with our simple installation steps.”
- Understanding Dummy Security Camera Power Requirements
- Preparing for Outdoor Installation: Essential Tools and Equipment
- Step-by-Step Guide to Installing an Outdoor Dummy Camera
Understanding Dummy Security Camera Power Requirements
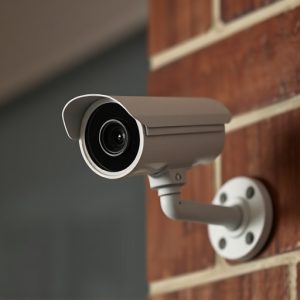
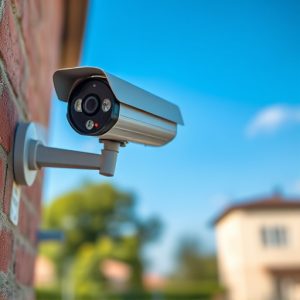
When planning an outdoor dummy camera installation, understanding power options is key. Dummy security cameras, designed to look like real surveillance equipment, require reliable power sources for optimal performance and longevity. The most common power options include battery-operated models, hardwired systems with external power supplies, or solar-powered alternatives.
For a smooth Outdoor Dummy Camera Installation Steps, consider your camera’s specific needs. Battery-powered cameras offer flexibility but necessitate regular replacement or charging. Hardwired units, while more permanent, eliminate the need for frequent battery changes. Solar-powered options are eco-friendly and suitable for remote locations, harnessing sunlight to charge an integrated battery. Selecting the appropriate power method aligns with your installation goals, ensuring your dummy security camera operates seamlessly and effectively.
Preparing for Outdoor Installation: Essential Tools and Equipment
When preparing for outdoor dummy security camera installation, having the right tools and equipment is essential. This includes a sturdy tripod or mounting bracket suitable for exterior conditions, screws and anchors designed to penetrate concrete or wooden posts, and a drill with the appropriate bits for creating holes. Also, consider a power supply that’s weatherproof and designed for outdoor use, ensuring your camera has a reliable and secure energy source.
For a seamless outdoor dummy camera installation process, start by identifying the ideal placement for your camera. Once determined, set up your tripod or bracket at the desired height and angle. Attach the camera firmly, securing it with screws to prevent any movement or theft. Connect the power supply, ensuring it’s properly grounded and protected from environmental elements. Lastly, test the camera’s functionality, checking all connections and adjusting settings for optimal performance in outdoor conditions.
Step-by-Step Guide to Installing an Outdoor Dummy Camera
Installing an outdoor dummy camera is a straightforward process that can significantly enhance your home or business security. Here’s a step-by-step guide to help you get started:
1. Choose the Right Location: Select a visible spot where potential intruders can easily see the camera, such as near entry points like doors or gates. Ensure it’s within range of power sources and has adequate cellular or Wi-Fi signal for remote monitoring (if applicable).
2. Unpackage the Camera: Carefully open the packaging to inspect all components included with your dummy camera. This usually includes the main unit, a mounting bracket, screws, and a power adapter. Double-check that you have everything needed before proceeding.
3. Mount the Camera: Secure the camera on a sturdy surface using the provided hardware. The mounting bracket should allow for adjustable positioning to ensure the camera captures clear footage of your desired area. Follow manufacturer instructions for optimal placement and stability.
4. Connect Power: Plug in the power adapter and locate the switch to turn the camera on. Some models might have different power requirements, so consult the user manual to avoid damage or malfunction. Ensure the camera is powered consistently to maintain its functionality.
5. Set Up Remote Access (Optional): If your dummy camera offers remote access features, follow the setup instructions provided by the manufacturer. This may involve connecting the camera to your home network and installing a corresponding app on your smartphone for live viewing and alerts.
Installing an outdoor dummy security camera is a straightforward process that can significantly enhance your home or business’s security. By understanding the power requirements and preparing with the right tools, you can ensure a successful Outdoor Dummy Camera Installation Steps in no time. Remember to choose a location offering adequate power sources and follow the simple steps outlined in this guide for optimal results.