Install an outdoor dummy camera by strategically placing a weatherproof device with a red blinking light, securing it to a wall or pole, and connecting it to power. Prepare tools and materials including a mounting bracket, screws, electrical tape, and a power drill. Choose a location with line of sight and natural cover, clean the surface, secure the bracket, attach the camera, connect cables, and configure settings via an app or remote control. Maintain the camera by verifying image quality, checking connections, testing motion detection, cleaning lenses, replacing batteries/memory cards as needed, monitoring power status, and scheduling periodic checks for outdoor durability.
“Unveil your home’s security with an Outdoor Dummy Camera Red Blinking Light—a clever, cost-effective way to deter potential intruders. This comprehensive guide takes you through every step of the installation process, from gathering essential tools and materials to positioning your dummy camera for maximum impact. Learn how to transform your outdoor space into a secure haven with this easy-to-follow, detailed tutorial on Outdoor Dummy Camera Installation Steps.”
- Understanding Dummy Camera Red Blinking Light: A Overview
- Gathering Essential Tools and Materials for Installation
- Step-by-Step Outdoor Dummy Camera Installation Guide
- Post-Installation Testing and Maintenance Tips
Understanding Dummy Camera Red Blinking Light: A Overview
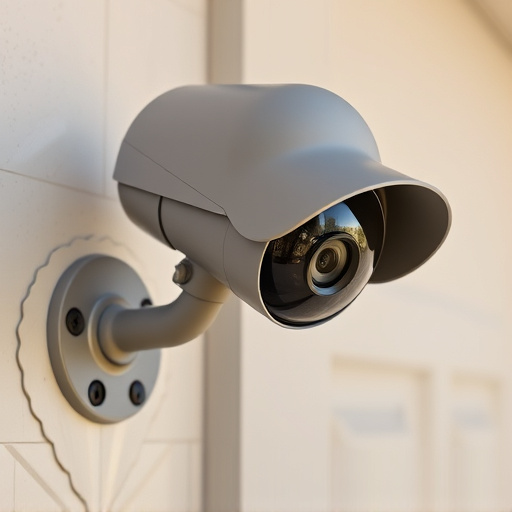
The outdoor dummy camera with a red blinking light is a security measure designed to deter potential intruders and provide a sense of protection for your property. This innovative device mimics the appearance of a real camera, complete with a blinking red light that simulates motion detection. Understanding its basic functions and installation process is crucial for homeowners seeking enhanced outdoor security.
An Outdoor Dummy Camera Installation typically involves several straightforward steps. First, locate an ideal spot where the camera can capture a clear view of your property and be visible from the street or nearby areas. Ensure it’s mounted securely on a wall or pole using the provided hardware. Next, connect the camera to a power source and configure any settings on the accompanying control panel or mobile app, including scheduling the red blinking light to activate at specific times or random intervals. This strategic placement and setup will create an effective deterrent, often misleading would-be intruders into believing your property is under constant surveillance.
Gathering Essential Tools and Materials for Installation
When preparing for an outdoor dummy camera installation, having the right tools and materials is crucial to ensure a seamless setup. For this project, you’ll need a few essential items like a dummy security camera (preferably weatherproof), a suitable mounting bracket or stand, screws or adhesive, electrical tape, and possibly a power drill with various bits. Additionally, consider getting a sunshade or cover to protect the camera’s lens from direct sunlight, ensuring optimal visibility.
For an efficient installation process following outdoor dummy camera steps, organize your workspace by laying out all tools and materials beforehand. Ensure you have a clear understanding of where each component goes during assembly. This preparation will streamline the installation, allowing you to quickly mount and secure your dummy camera at the desired location, providing enhanced security for your outdoor spaces.
Step-by-Step Outdoor Dummy Camera Installation Guide
Setting up an outdoor dummy camera is a straightforward process, offering a simple and effective way to enhance security or deter potential intruders. Here’s your step-by-step guide to installing one seamlessly:
1. Choose the Ideal Location: Select a strategic spot for your dummy camera, considering factors like line of sight, proximity to entry points, and natural cover. Ensure it’s visible enough to act as a deterrent but still provides a clear view of any approaching individuals or vehicles.
2. Prepare the Mounting Surface: Clean the area where you plan to install the camera. If necessary, use screws or adhesive designed for outdoor use to secure the mounting bracket firmly. Ensure stability by checking that the base is level and won’t be affected by strong winds or vibrations.
3. Attach the Dummy Camera: Carefully mount the dummy camera onto the bracket. Some models may come with attachments or adapters to fit various brands of security cameras. Make sure it’s securely fastened, allowing for easy adjustments if needed.
4. Connect Power and Data Cables: Run power cables from the camera to a nearby electrical source, ensuring proper grounding for optimal performance and safety. For data connection, use Ethernet or Wi-Fi depending on your system’s compatibility and internet availability at the location.
5. Configure Settings (if applicable): If your dummy camera has adjustable features like motion sensitivity, infrared lighting, or recording capabilities, set them according to your preferences using the accompanying app or remote control. Test these settings to ensure they function accurately.
Post-Installation Testing and Maintenance Tips
After a successful Outdoor Dummy Camera Installation, thorough testing is crucial to ensure optimal performance. Start by verifying that the camera captures clear images and records videos with proper lighting and resolution. Check all connections to confirm stable signal transmission. Additionally, test the motion detection functionality by triggering it manually to ensure accurate responsiveness.
Maintenance requires regular cleaning of the camera lens for optimal visibility and replacing batteries or memory cards as needed. Keep an eye on the blinking red light, which indicates power status; a persistent red light may signal a connection issue or battery exhaustion. Schedule periodic checks to ensure the dummy camera remains operational, especially in harsh outdoor environments, and consider weatherproofing measures for extended durability.
The installation of an outdoor dummy camera, with its distinctive red blinking light, offers a simple yet effective deterrent for potential intruders. By following the detailed steps outlined in this guide, including gathering the necessary tools and materials, you can successfully install your dummy camera in just a few easy stages. After the installation is complete, regular testing and maintenance will ensure it remains an active and visible security measure, providing peace of mind for your home or business. Remember, these clear and concise Outdoor Dummy Camera Installation Steps are designed to empower individuals to take control of their safety without breaking the bank.