Outdoor dummy camera systems deter theft and vandalism by simulating enhanced surveillance. To install effectively, users should: strategically select visible locations, mount cameras at eye level or slightly elevated, weatherproof with protective casing, and regularly clean and maintain for a lifelike appearance. The installation process involves preparing essential tools, selecting a location, drilling pilot holes, aligning hardware, attaching the housing securely, reconnecting wires, sealing connections, and ensuring proper orientation. Regular maintenance, including lens cleaning and battery checks, is vital for system longevity and effectiveness.
“Elevate your home or business security with a simple yet effective upgrade: replacing your outdoor security camera dummy housing. This comprehensive guide delves into the process, from understanding the benefits of outdoor dummy cameras to mastering the installation steps. Learn about essential tools and materials required for a seamless replacement project. By following our detailed, step-by-step instructions, you’ll enhance your surveillance system’s appearance and functionality, ensuring optimal protection. Discover expert tips for final touches and maintenance to keep your new camera housing operating smoothly.”
- Understanding Outdoor Dummy Camera Systems
- Preparing for Replacement: Tools and Materials Needed
- Installation Process: Step-by-Step Guide
- Final Touches and Maintenance Tips
Understanding Outdoor Dummy Camera Systems
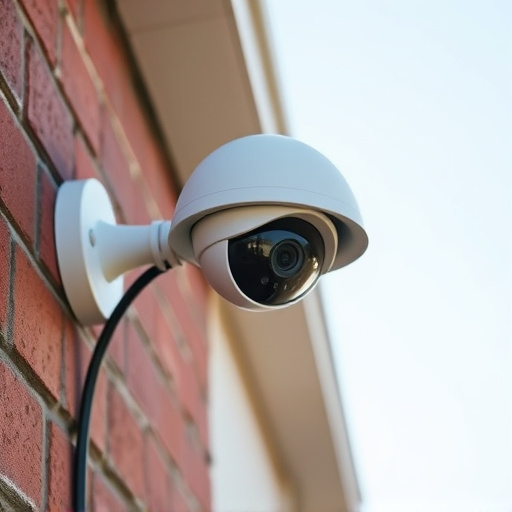
Outdoor dummy camera systems, also known as decoys or fake security cameras, are an effective deterrent for potential thieves and vandals. These devices provide a visual illusion of enhanced surveillance, even though they don’t capture actual footage. Understanding how to install these outdoor dummy cameras properly is crucial for maximizing their effectiveness.
The installation process typically involves several steps, starting with selecting the right location. Choose spots that offer clear visibility and are strategically placed to mimic real camera coverage. Mounting them on posts or walls, ensuring they’re at eye level or slightly elevated, adds realism. It’s also important to consider weatherproofing for outdoor use, using protective casing and sealing any openings against elements like rain and dust. Regular cleaning and maintenance, such as wiping down the lens area, help keep these dummy cameras looking lifelike.
Preparing for Replacement: Tools and Materials Needed
When preparing to replace your outdoor security camera dummy housing, ensure you have all the necessary tools and materials at hand for a smooth installation process. This typically includes a screwdriver, wire strippers, and any specific mounting hardware included with your new housing. It’s also beneficial to have a ladder or a sturdy stool to reach the desired height, especially if your old housing was mounted on a pole or wall. For outdoor installations, weatherproof sealants and protective gear like gloves and safety goggles are essential to prevent damage during the replacement process.
Following the Outdoor Dummy Camera Installation Steps carefully will ensure a secure fit for your new housing. Start by removing the old housing, taking note of its orientation and any connected wires. Next, clean the mounting surface, ensuring it’s free from debris or dirt. Then, attach the new housing using the provided hardware, securing it tightly but avoiding overt tightening to prevent damage. Once the housing is in place, reattach any wires and seal the connections with weatherproof sealant for optimal protection against the elements.
Installation Process: Step-by-Step Guide
Installation Process: Step-by-Step Guide for Outdoor Dummy Camera
1. Preparation: Before starting, ensure all necessary tools are at hand—a drill with various bits, a measuring tape, and your new dummy camera housing. Choose a suitable location for your outdoor security camera, considering factors like visibility, proximity to entry points, and environmental protection. Make sure the area is free from obstructions that could block its view.
2. Drill Holes: Using the provided mounting hardware or a compatible drill bit, carefully drill pilot holes at the marked locations on the housing. Ensure the holes align with the mounting brackets or screws. Create a secure base for your camera by screwing in the mounting brackets or directly attaching the housing to a sturdy surface, like wooden posts or walls. Next, position the dummy camera within the housing, ensuring it’s level and aligned correctly. Secure it firmly using the appropriate fasteners.
Final Touches and Maintenance Tips
After successfully installing your outdoor dummy camera, it’s crucial to add those final touches that will ensure its effectiveness and longevity. Position the camera housing securely, ensuring it’s firmly attached to a suitable surface or pole. This step is vital as it prevents theft or damage, allowing you to fully utilise the device’s capabilities. Next, connect the power supply, making sure the cable is hidden for aesthetic appeal and security.
Regular maintenance is key to keeping your outdoor dummy camera in top condition. Clean the lens periodically with a soft cloth to maintain optimal visibility. Check the battery level and ensure prompt replacement when needed. Also, inspect the housing for any signs of damage or wear and make repairs as required. Remember that these simple steps will go a long way in ensuring your security system remains effective and reliable.
Replacing your outdoor security camera dummy housing is a straightforward process that can significantly enhance your property’s security. By following the detailed installation steps outlined in this article, from preparing the necessary tools and materials to the final touches, you’ll not only improve your surveillance system but also add a layer of visual deterrence to potential intruders. Regular maintenance will ensure your dummy camera housing remains effective, providing peace of mind for homeowners seeking robust security solutions.