Outdoor Dummy Camera Installation: A Comprehensive Guide
Outdoor dummy camera installation offers a simple, cost-effective way to boost home or business secu…….
Outdoor dummy camera installation offers a simple, cost-effective way to boost home or business security by mimicking real surveillance equipment. The key steps involve selecting strategic locations with maximum visibility and clear footage, preparing the mounting surface, attaching the bracket, positioning the camera, connecting power and data cables, testing functionality, and regularly maintaining the device through cleaning, LED verification, weather sealing, inspection, and battery monitoring.
Discover the power of outdoor dummy dome cameras with blinking LEDs for enhanced security. This comprehensive guide explores the benefits, installation process, and key considerations for choosing the perfect location. From understanding these advanced surveillance tools to a step-by-step installation manual, you’ll learn how to set up your own effective deterrent system. We also provide maintenance tips to ensure optimal performance, covering everything from testing LED features to regular care routines for long-lasting security.
- Understanding Dummy Dome Cameras and Their Benefits
- Choosing the Right Location for Outdoor Camera Installation
- Step-by-Step Guide to Installing Your Dummy Dome Camera
- Testing and Positioning the Blinking LED Features
- Maintenance Tips for Optimal Performance of Outdoor Cameras
Understanding Dummy Dome Cameras and Their Benefits
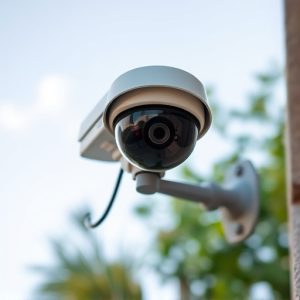
Dummy dome cameras, also known as fake security cameras, are an innovative and cost-effective solution for home or business owners looking to enhance their security. These devices offer a simple yet effective way to deter potential intruders, as they mimic real surveillance equipment. With their distinctive dome shape and blinking LED lights, they provide a visual deterrent without the need for extensive installation processes.
One of the key benefits of outdoor dummy camera installation is its ease and versatility. Unlike traditional security systems, these cameras require minimal setup, making them ideal for temporary or permanent placement. The steps to install an outdoor dummy camera involve mounting it at a strategic location, ensuring good visibility, and connecting it to a power source. This straightforward process allows property owners to quickly add an extra layer of protection without the complex wiring and professional installation typically associated with security systems.
Choosing the Right Location for Outdoor Camera Installation
When considering an outdoor dummy camera installation, selecting the optimal location is a crucial step in the process. The right spot can ensure maximum visibility, deter potential intruders, and provide clear, unobstructed footage. Start by assessing your property’s layout and identifying areas with high foot traffic or points that offer a view of entrances, exits, and common hangouts. Consider placing the camera near windows, doors, or any other vulnerable entry points to act as a powerful deterrent.
Additionally, look for locations with ample natural light during the day and minimal shadowing, which can obscure camera views. Ensure the chosen spot is protected from extreme weather conditions like heavy rain or snow, yet positioned high enough to avoid physical damage. By strategically placing your outdoor dummy camera, you’ll create an environment where potential intruders are deterred, while also capturing valuable footage for enhanced home security.
Step-by-Step Guide to Installing Your Dummy Dome Camera
Setting up an outdoor dummy dome camera is a straightforward process, offering a simple and cost-effective way to enhance your home security. Here’s a step-by-step guide to ensure a seamless installation:
1. Select the Ideal Location: Choose a strategic spot outdoors where you want to install the camera, such as near your front door or in your yard. Ensure it’s visible and has adequate lighting for optimal footage. Make sure the location provides a clear view of the areas you wish to monitor.
2. Unbox Your Camera: Carefully remove all components from the packaging, including the dummy dome camera, mounting hardware, and any accessories. Take note of the included items to ensure nothing is missing.
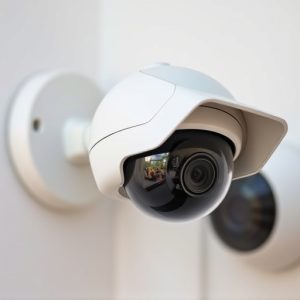
3. Prepare the Mounting Surface: Clean and prepare the area where you plan to mount the camera. Ensure it’s sturdy and level. If necessary, use a level to check the surface’s evenness before attaching the mounting bracket.
4. Attach the Mounting Bracket: Securely fix the mounting bracket to the prepared surface using the appropriate hardware provided. Make sure it’s firmly in place and can withstand outdoor conditions.
5. Position and Align the Camera: Attach your dummy dome camera to the bracket, ensuring proper alignment. Adjust the camera’s position until you achieve the desired view, making sure it covers the necessary areas.
6. Connect Power and Data Cables: Plug in the power cable to provide electricity to your camera. If equipped with a data cable, connect it to your network for wireless functionality. Ensure all connections are secure and well-protected from external elements.
7. Test and Adjust: After installation, test the camera’s functionality, including its LED lights and motion detection (if applicable). Make any necessary adjustments to ensure optimal performance.
Testing and Positioning the Blinking LED Features
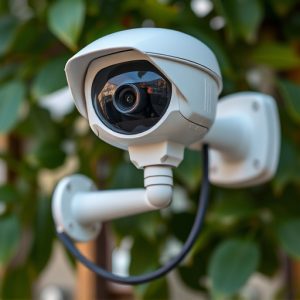
When testing the blinking LED features of an outdoor dummy camera, ensure the device is positioned strategically for optimal visibility. Follow the Outdoor Dummy Camera Installation Steps to mount the camera in a location that offers clear line-of-sight to the areas you wish to monitor. This could be on a fence, wall, or pole, ensuring the LED lights are visible from various angles. During testing, observe how the LEDs blink; they should do so consistently and noticeably, indicating the camera’s active state.
Regularly verify the camera’s functionality by checking the LED indicators while powering it through the provided battery or cable. Ensure the blinking pattern is as expected and that the lights adjust according to ambient light conditions. Proper positioning will enhance the camera’s deterrence effect, making potential intruders more aware of their surroundings.
Maintenance Tips for Optimal Performance of Outdoor Cameras
Proper maintenance is key to ensuring your outdoor dummy dome cameras with blinking LEDs function optimally and remain effective security tools. Here are some essential tips for maintaining your outdoor camera:
Regularly clean the lens using a soft, dry cloth to remove any dust or debris that could obstruct the view. Check the camera’s settings to ensure the LED illumination is functioning correctly, allowing for clear night-time visibility. Keep the camera housing sealed to protect against weather changes and moisture. Periodically inspect the mounting and connections to ensure stability and prevent any potential disconnections. Additionally, verify the battery life, especially in non-wired models, and replace them when necessary.
Installing an outdoor dummy dome camera is a straightforward process that can significantly enhance your home or business security. By carefully selecting the installation location and following the steps outlined in this guide, including testing the blinking LED features, you’ll enjoy peace of mind knowing your premises are under constant surveillance. Regular maintenance will ensure optimal performance, making these cameras an effective and affordable security solution for any environment.