Mastering Outdoor Dummy Camera Installation: A Step-by-Step Guide
Installing outdoor dummy camera brackets is a cost-effective way to boost security without actual su…….
Installing outdoor dummy camera brackets is a cost-effective way to boost security without actual surveillance. The process involves selecting matching brackets, measuring and marking mounting locations, drilling pilot holes, securing brackets, positioning fake cameras at convincing angles, and adhering to local laws and property lines. Meticulous preparation ensures a robust, aesthetically pleasing setup that deters intruders by simulating constant observation.
“Enhance your home or business security with our guide to fake security camera mounting brackets, a cost-effective solution for deterring crime. This article explores everything you need to know about outdoor dummy camera installation, from understanding the basics of fake brackets to effective preparation and placement techniques. By following our step-by-step guide, you’ll master the art of installing these decoys, ensuring optimal protection without breaking the bank. Discover expert tips for a successful Outdoor Dummy Camera Installation Steps today.”
- Understanding Fake Security Camera Mounting Brackets
- Preparation and Planning for Outdoor Dummy Camera Installation
- Step-by-Step Guide to Effective Placement and Maintenance
Understanding Fake Security Camera Mounting Brackets
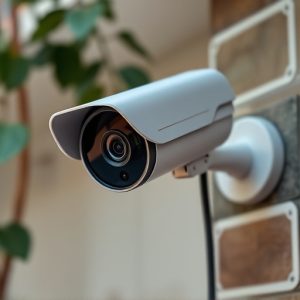
Fake security camera mounting brackets, also known as dummy or mock camera brackets, are designed to mimic the appearance of genuine security camera installations. These brackets offer a cost-effective and discreet way to enhance home or business security without actually deploying a functional surveillance system. Understanding how to install these fake brackets correctly is crucial for achieving an authentic look and deterring potential intruders.
The outdoor dummy camera installation process typically involves several simple steps. First, select brackets that match the style and size of your desired cameras. Next, carefully measure and mark the mounting locations on your structure or pole. Drill pilot holes and securely attach the brackets using appropriate hardware. Finally, position fake cameras at eye-level or slightly elevated angles to create a convincing surveillance setup. By following these steps, you can effectively fool would-be intruders into believing your property is under constant observation, thereby enhancing its overall security.
Preparation and Planning for Outdoor Dummy Camera Installation
Before installing any outdoor dummy camera, meticulous preparation and planning are essential steps in the Outdoor Dummy Camera Installation process. Begin by assessing your intended location—identifying suitable spots that offer unobstructed views while adhering to local regulations and property boundaries. Consider factors like lighting conditions, proximity to potential obstacles or blind spots, and accessibility for maintenance. Ensure you have all necessary tools and hardware, including high-quality brackets designed for robust outdoor use.
Next, gather essential materials such as a drill, screwdrivers, cable ties, and weatherproof seals. Plan the placement of your dummy camera, ensuring it’s positioned at a strategic angle to capture critical areas effectively. Mark the mounting holes on the wall or surface using a pencil, double-checking alignment before drilling to prevent damage. By following these outdoor dummy camera installation steps, you’ll create a convincing security setup that deters potential intruders while maintaining an aesthetically pleasing environment.
Step-by-Step Guide to Effective Placement and Maintenance
To ensure an effective outdoor dummy camera installation, follow these simple steps:
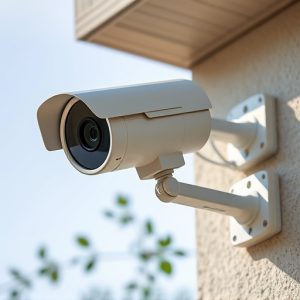
1. Location Selection: Choose a strategic spot for your security camera. Opt for areas with good visibility, away from obstructions like trees or buildings, to maximize the camera’s field of view. Consider height as well; mounting the camera higher can provide a broader perspective and deter potential intruders.
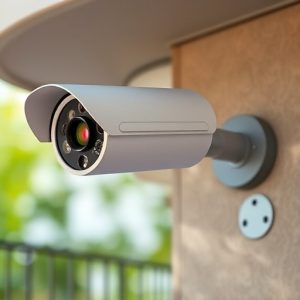
2. Prepare the Surface: Before attaching the mounting bracket, ensure the surface is clean, dry, and free from debris. Use a level to check if the area is even, as an uneven surface could affect the camera’s alignment. For outdoor spaces, consider using weatherproof screws and brackets to protect against harsh elements.
3. Mounting Brackets: Attach the dummy camera to the mounting bracket, ensuring a secure fit. Position the camera in the desired orientation—horizontal or vertical—to cover key entry points or areas of interest. Make sure the bracket is sturdy enough to withstand wind and other environmental factors.
4. Wiring and Connections: Connect the camera to its power source, typically through a cable run from an existing electrical outlet or a solar panel (for wireless models). Ensure all connections are secure and well-protected from damage. Test the power supply and camera functionality before moving on.
5. Testing and Maintenance: Regularly test the camera’s visibility and clarity during different lighting conditions. Clean the lens periodically to maintain optimal image quality. Check the mounting for any signs of loose or damaged parts, tightening as needed. Keeping your outdoor dummy camera well-maintained will ensure its effectiveness as a deterrent and monitoring tool.
Fake security camera mounting brackets offer a practical and cost-effective solution for those seeking to enhance their home or business security. By following the outlined steps for outdoor dummy camera installation, you can create an effective deterrent without breaking the bank. Proper planning, careful placement, and regular maintenance will ensure these brackets serve their purpose, providing peace of mind and a safer environment. Remember, even dummy cameras can act as a powerful visual reminder to potential intruders, deterring malicious activity.