To install an outdoor dummy camera effectively, first prepare your site by assessing lighting, accessibility, and local regulations. Next, strategically place the camera in a visible location, securing its housing unit and connecting it to power and monitoring systems. LED lights enhance realism, while proper routing of cables ensures a neat, hidden setup. This simple process bolsters security with an affordable, realistic deterrent.
“Uncover the power of deterrence with an empty security camera housing unit—a cost-effective alternative to real cameras. This comprehensive guide explores the world of outdoor dummy camera installation, offering a detailed step-by-step process for DIY enthusiasts. From understanding the benefits and preparing your location to final assembly, we’ll walk you through the entire journey. Master the art of enhancing security with this simple yet effective Outdoor Dummy Camera Installation, ensuring peace of mind in any environment.”
- Understanding Empty Security Camera Housing Units
- Preparing for Outdoor Dummy Camera Installation
- Step-by-Step Guide to Installing an Outdoor Dummy Camera
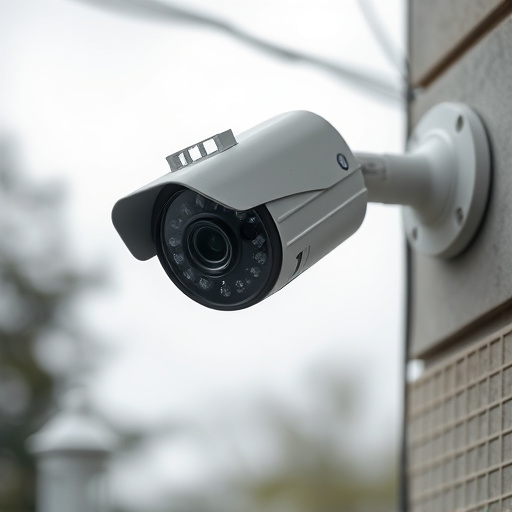
Understanding Empty Security Camera Housing Units
Empty security camera housing units, often referred to as dummy or mock cameras, serve as an effective deterrent for potential criminals. Understanding how to install these outdoor dummy camera systems is crucial for homeowners and business owners seeking enhanced security. The installation process involves several simple yet strategic steps.
First, choose a location with clear visibility, ideally in plain sight of passersby. Mount the housing unit on a pole or wall, ensuring it’s secure and stable. Then, carefully route the cable from the camera to the recording device or monitor, making sure it’s hidden from view. Once connected, test the system to ensure smooth operation. This installation method offers a cost-effective solution, providing the appearance of a fully functional security system without the need for expensive hardware.
Preparing for Outdoor Dummy Camera Installation
Before installing an outdoor dummy camera, it’s crucial to prepare your site meticulously. Start by assessing the location where you intend to place the housing unit. Consider factors like lighting conditions—adequate illumination is key for clear footage—and potential obstacles that might interfere with the camera’s view or cause damage during installation. Ensure accessibility for power connections and internet cabling, as these are essential components of an operational dummy camera system.
For a successful Outdoor Dummy Camera Installation Steps, gather all necessary tools and equipment in advance. This typically includes screws, a drill, wire strippers, and possibly a ladder for reaching elevated areas. Check local regulations regarding security cameras to ensure compliance with privacy laws or building codes. With proper preparation, you’ll be well on your way to enhancing your property’s security with an effective dummy camera setup.
Step-by-Step Guide to Installing an Outdoor Dummy Camera
Installing an outdoor dummy camera is a straightforward process that can significantly enhance your home or business security. Here’s a step-by-step guide to help you get started:
1. Choose the Right Location: Select a visible spot, preferably with good lighting, to place your dummy camera. Ensure it’s positioned where intruders can be easily spotted, discouraging potential thieves. Consider areas like entry gates, front porches, or near windows.
2. Prepare the Housing Unit: Take your empty security camera housing and clean it thoroughly. Ensure all parts are free from debris and dust. If needed, paint the housing to match your surroundings for a more seamless look. Fix any brackets or mounts included in the package to secure the camera firmly in place.
3. Attach the Dummy Camera: Carefully attach the dummy camera to the housing unit using the provided hardware. Ensure it’s securely fastened and aligned correctly. Some units come with LED lights that can be activated remotely, adding an extra layer of realism.
4. Connect to Power Source: Plug in your dummy camera and connect it to a power source. Many models are battery-powered, but hardwiring ensures consistent operation without frequent battery changes. Ensure proper grounding for safety and stability.
5. Position and Aim: Adjust the camera’s angle and position to capture a clear view of the desired area. You may need to use adjustable brackets to get the perfect shot. Ensure the lens is unobstructed and offers a clear line of sight.
6. Test and Enjoy: Once installed, test the camera’s functionality, including motion detection (if applicable). Check if it captures clear images or video footage. With your outdoor dummy camera now in place, you can enjoy enhanced security and peace of mind.
An outdoor dummy camera installation can significantly enhance home security without breaking the bank. By understanding the importance of these units and following the simple steps outlined in this guide, you can easily prepare your property for added protection. Remember, even an empty security camera housing acts as a powerful deterrent against potential intruders. Implement these Outdoor Dummy Camera Installation Steps to take control of your safety and peace of mind.